Winter home maintenance can help keep your home warm, lower your energy bills, and prevent catastrophic problems like frozen and burst water pipes. Use these winter maintenance tips to get ahead of unexpected winter weather.
Outdoor Winter Maintenance
Prepare your yard and house exterior for winter while the weather is still relatively mild. You’ll be glad you took care of these tasks before the first major snowfall!
Plant, tree, and lawn maintenance
- Rake up any remaining leaves to clear your yard. This prevents mold while keeping your grass healthy.
- Cut back dead branches on any trees around your home.
- Finish storing any lawn decorations, outdoor furniture and other items that could be damaged.
- Clean and store your gardening tools. If you haven’t already, make it easier to access winter tools like snow blowers and shovels.
Watering system and spigot maintenance
- Shut down your sprinklers and have the system winterized by a professional to ensure that there isn’t any water trapped in your pipes.
- Remove all hoses from outside spigots, drain them and store them for the winter.
- If possible, turn off the water connection at the spigots to prevent pipe breaks when it gets below freezing.
Roof, gutter, and other maintenance
- Check your roof for missing shingles or other damage that could let melting snow or ice inside.
- Clean your gutters.
- Take a walk around the foundation of your home and clear any debris that you find. If you notice any cracks, seal them to prevent pests from getting in.
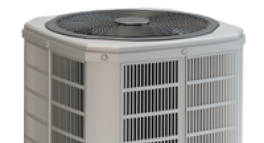
- Cover your central air conditioning unit to protect it throughout winter.
- Stock up on salt and ice melt.
Indoor Winter Maintenance
Next, it’s time to focus on your home’s interior. There are a few important things to do before it gets too cold.
Water pipe maintenance
Special note: It’s very important to prepare your water pipes for winter. Even places that are normally very warm, like Texas, have experienced extreme cold in recent years. And places that are normally cold, like Chicago, are experiencing weather that consistently dips into extremes like -40.
Burst water pipes can do a ton of damage to your home. Take the following steps to reduce the likelihood of pipes freezing.
- Add a layer of pipe insulation to exposed pipes to avoid freezing. See how.
- Know where your water main is in case a pipe bursts.
- If a pipe freezes, take steps to thaw it.
- Open under-sink cabinets during extreme cold to allow warm air to reach pipes.
- Let a faucet drip slowly to prevent freezing.
HVAC maintenance
- If you haven’t recently, have your HVAC system inspected by a professional.
- Change the filters in your HVAC system and check your ductwork. Everything should be sealed at joints and intersections to prevent heated air from escaping.
Room maintenance
- If you haven’t cleaned your fireplace in the last two years be sure to clean the chimney thoroughly. This prevents dangerous fires.
- Unpack blankets, space heaters, and other cold-weather things you’ll need to keep your family warm and comfortable.
- If you’ll be hosting holiday parties, it’s the perfect time to clean your carpets and take care of other cleaning-related tasks.

Let 2-10 Protect Your Home
During the winter, important home systems like your furnace run more often. That can leave them exposed to expensive breakdowns from routine use. Keep your home and budget protected with a 2-10 Home Buyers Warranty Home Service Plan!