fbpx

Quick Guides

Help Agents / Quick Guides

Quick Guides

Create an Account

Log In to Your Account

Sign in here. If you don’t have an active login, sign up now. If you forgot your password, reset it now.

Part of a 2-10 advertising program?
Accounts have been automatically created for agents in brokerages that are part of a 2-10 advertising program. Your default password is your first and last name, lowercase without spaces – e.g. “johnsmith”.

Download Quick Guide
Download Complete User Guide


1. Register Your Account

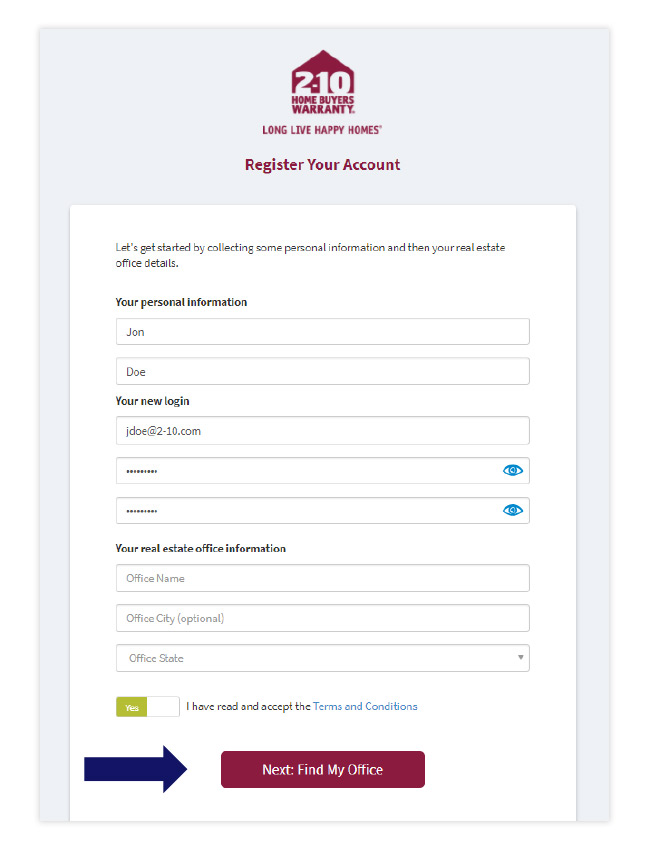
  • Enter your personal information.
  • Confirm that you have read and accept the Terms & Conditions
  • Click Next: Find My Office to continue
– register 1 – Create an Account


2. Select Your Office

  • Find your office on the list of verified real estate offices. Then click the green Select button.

– register 2 – Create an Account

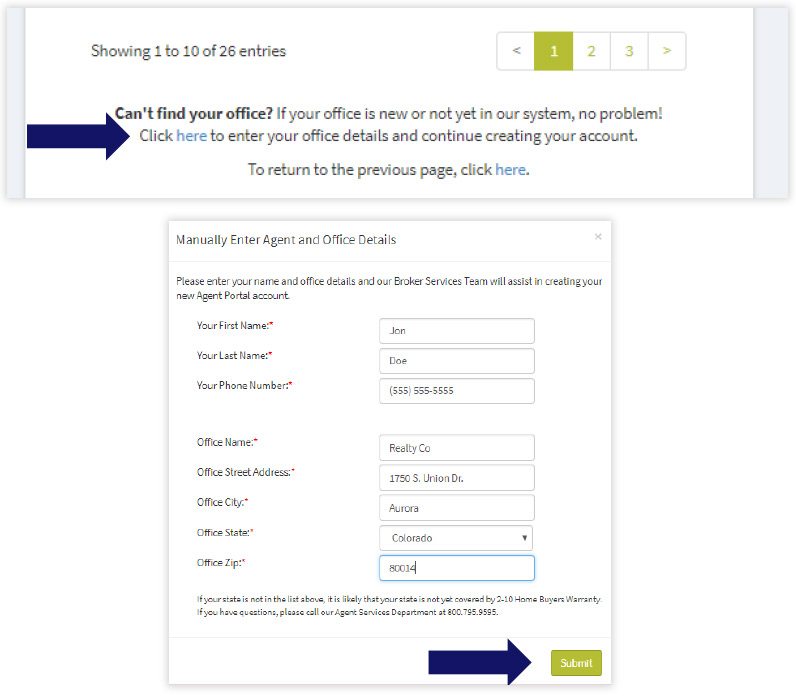
  • If your office isn’t listed, scroll to the bottom of the page and click here underneath Can’t find your office? You will then manually enter your agent and office details.
– register 3 – Create an Account


3. Select Yourself

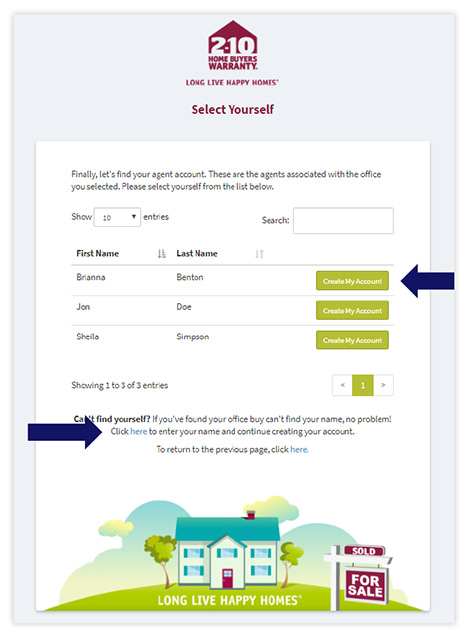
  • Find your agent account from the list of registered agents within your office and click the green Create My Account button.
– register 4 – Create an Account

  • If you aren’t listed, scroll to the bottom of the page and click the link underneath Can’t find yourself? You will then manually enter your agent details.

– register 5 – Create an Account


4. Personalize Your Experience

  • Select the My Account tab to personalize your account
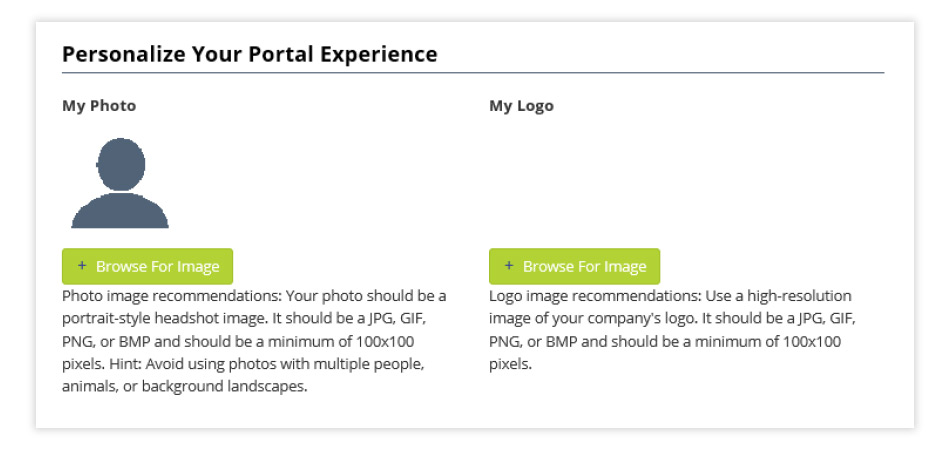
  • Under Personalize Your Portal Experience click the Browse For Image button
  • Select a profile photo to upload from your computer
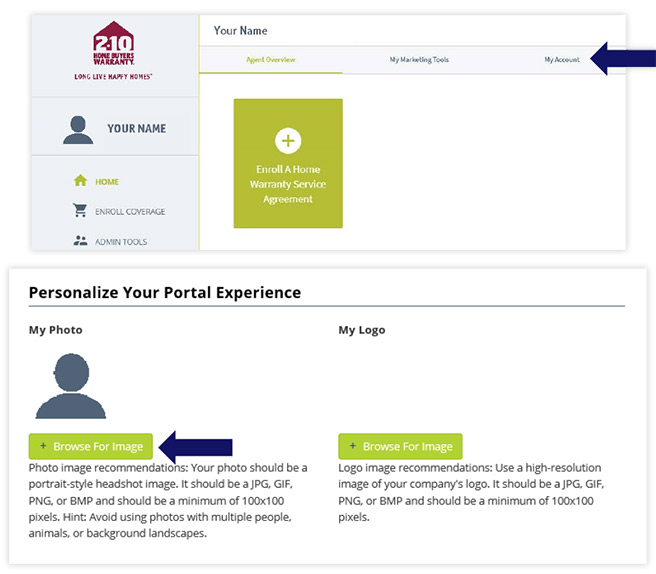
– register 6 – Create an Account

You successfully created your account. Log in for 24/7 access to easily:

  • Enroll & update coverage for your clients
  • Access free marketing materials
  • Track your clients’ Home Service Plan activity.

Enroll a Home

Download Quick Guide
Download Complete User Guide

Step 1

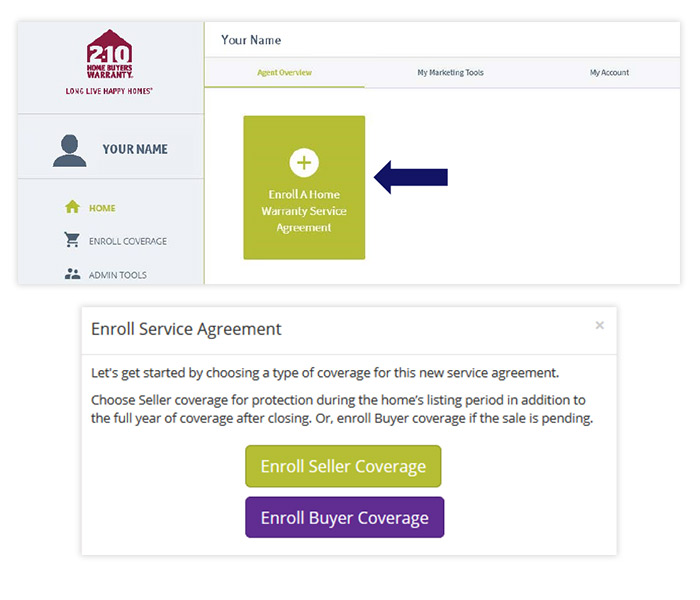
  • From Home on Agent Portal, click the green tile Enroll a Home Warranty Service Agreement.
  • Select the type of coverage to enroll.

– enroll 1 – Enroll a Home


Step 2

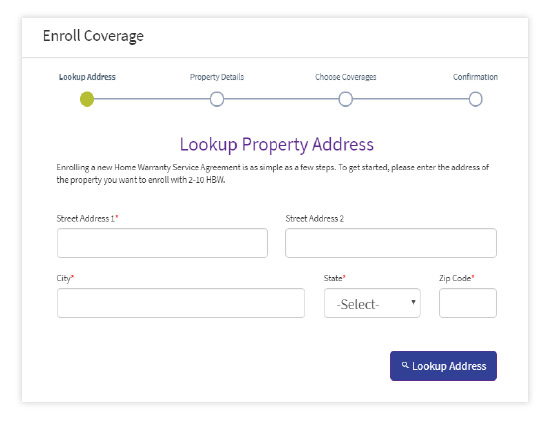
  • Enter the property address for the home you’re enrolling.
  • Verify the address using the Lookup Address button.
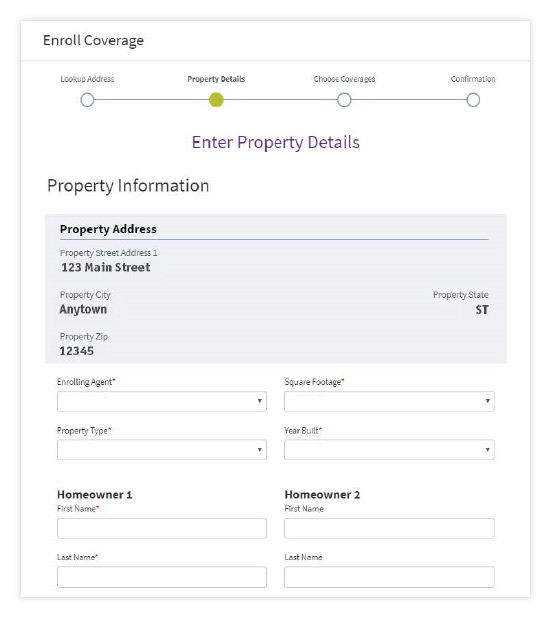
  • Please provide all property information, including home details (such as square footage and year built), contact information for all parties involved (Buyer, Seller, and their respective agents), and the closing date, if applicable.
– enroll 2a – Enroll a Home
– enroll 2b – Enroll a Home

Step 3

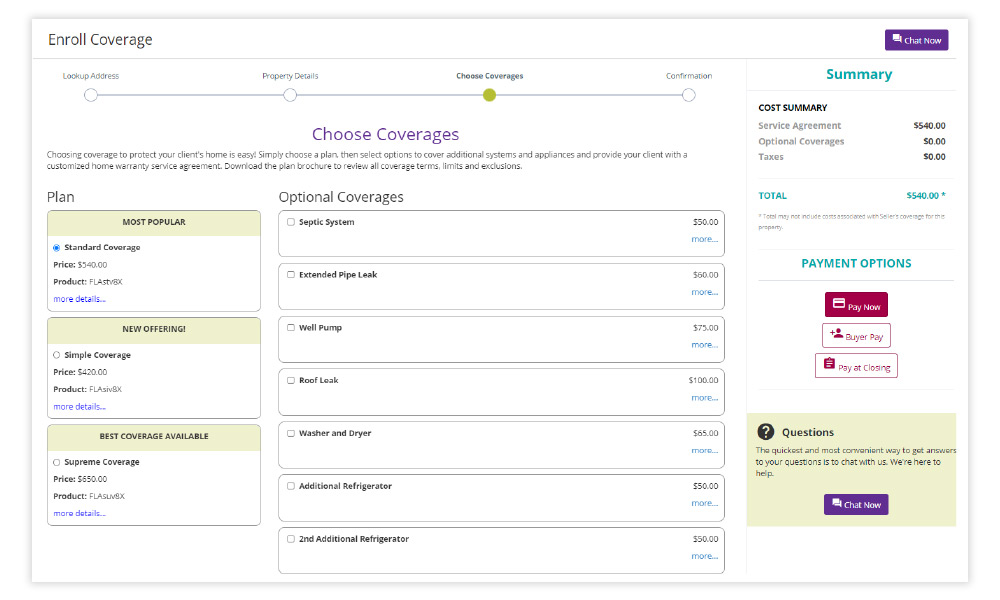
Choose the product and optional coverages for the enrollment.

Payment methods include:

  • Pay Now via Credit Card.
  • Buyer Pay to email the Buyer so they can review their coverage and complete payment.
  • Pay at Closing by sending an invoice to the title company.

– enroll 3 – Enroll a Home

Enrollment Changes

Agent Portal allows you to quickly and easily edit coverage and update certain details, including:

  • Convert a listing to a closing
  • Add optional coverage
  • Change the closing date
  • Update homeowner information
  • Resend confirmation and invoice to title company
  • Request Buyer to pay

Download Quick Guide
Download Complete User Guide


Convert Seller Coverage to Buyer

You can convert Seller coverage to Buyer coverage in two ways:

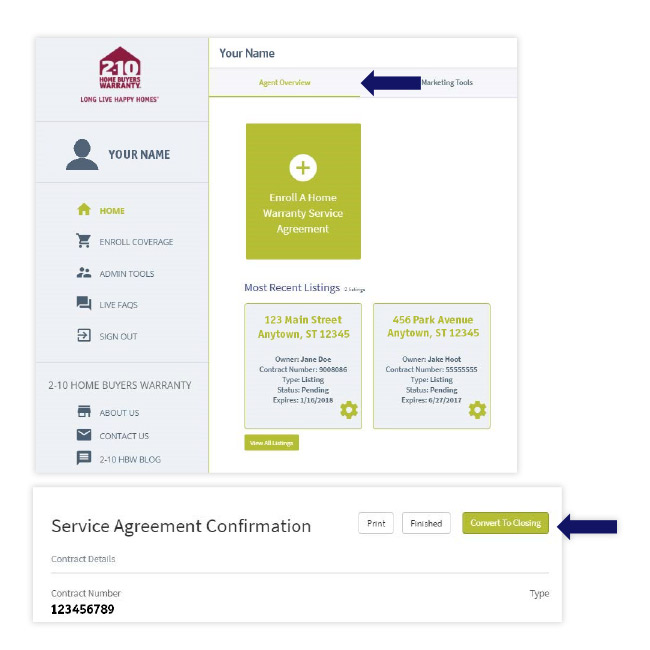
  • From Agent Overview by hovering over the gear icon on the property and selecting Convert to Closing
  • From the Service Agreement Confirmation page by selecting Convert To Closing

– convert to closing – Enrollment Changes


Add Options

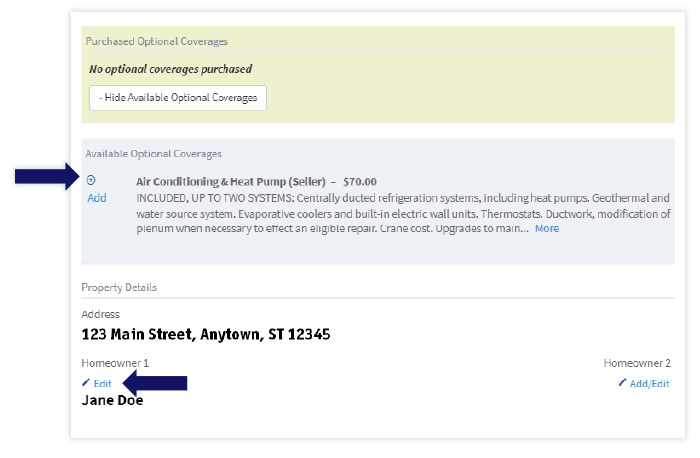
  • Click the + View Available Optional Coverages button to view the available options
  • Click Add to add the option

– update homeowner info – Enrollment Changes

Change Homeowner Information

  • Click Edit underneath the Property Details section
  • Be sure to provide the homeowner’s email address

Service Agreement Confirmation Page

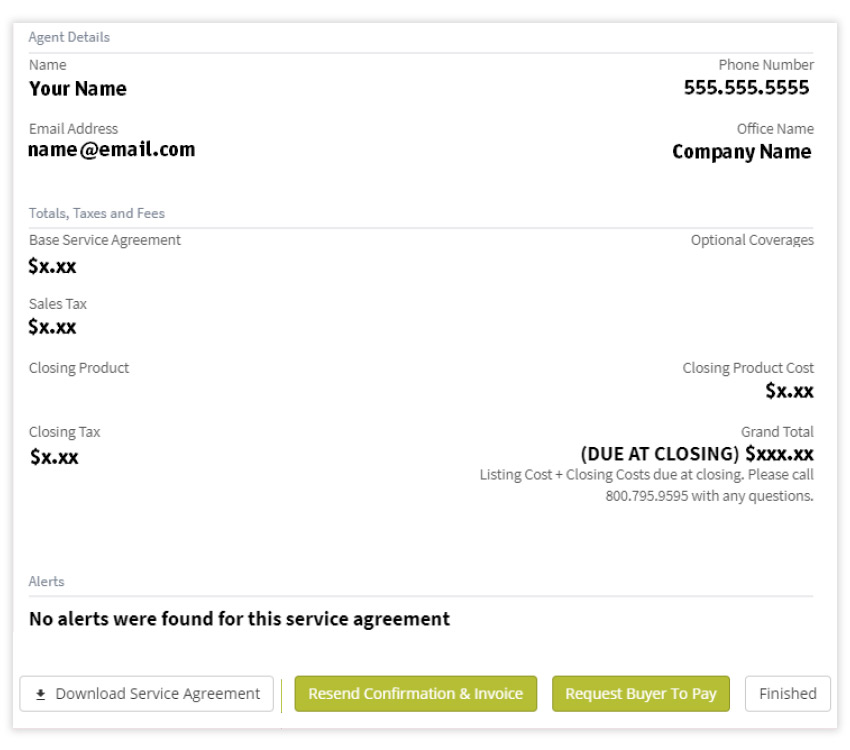
  • Download Service Agreement
  • Resend Confirmation & Invoice
  • Request Buyer To Pay

– confirmation page – Enrollment Changes

Agent Marketing Materials

Agent Portal provides access to a library of free, customizable marketing tools to help you promote and grow your business, including:

  • Monthly homeowner-facing newsletters
  • Maintenance Manual
  • Open house toolkit and checklist
  • Service Agreements
  • Asurion Home+ home tech protection offer

Download Quick Guide
Download Complete User Guide


Access Materials

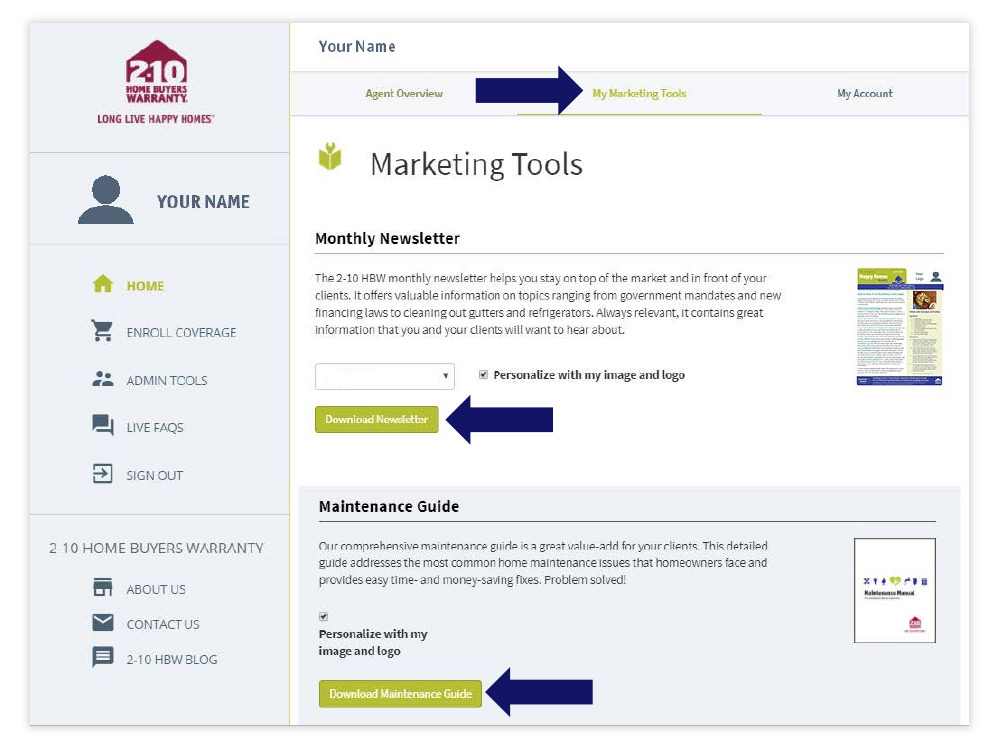
  • You can find Marketing Materials for Agents under the My Marketing Tools tab
  • Download materials by clicking the Download button for the item you’d like

– access marketing 1 – Agent Marketing Materials


Personalize Your Materials

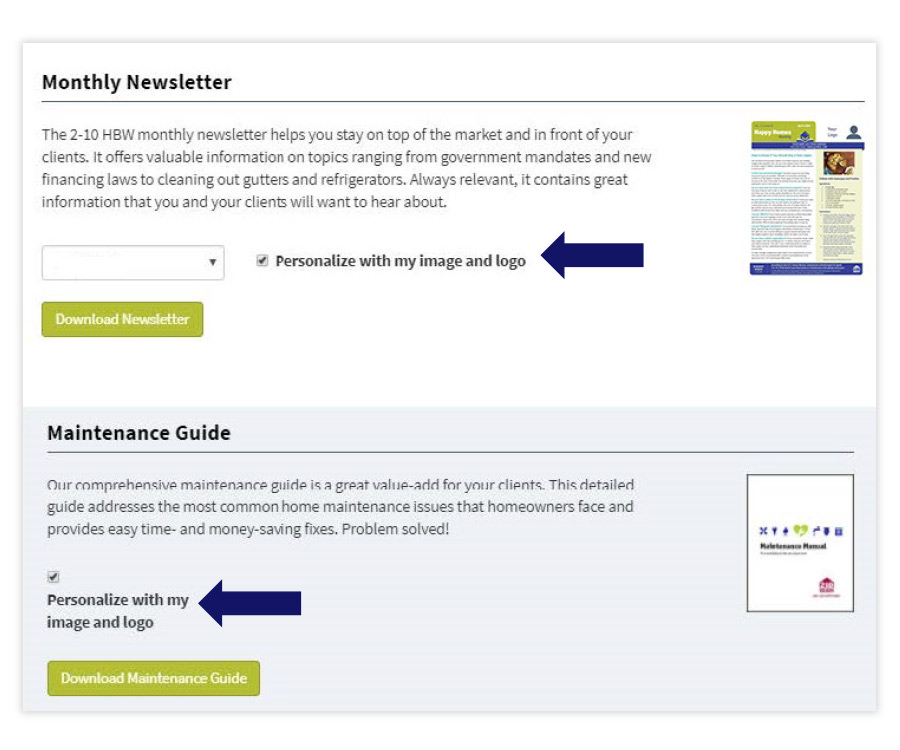
You can add your photo, logo, and contact information to the monthly homeowner-facing newsletters and the Maintenance Manual.

  • To personalize, upload your photo and logo from the My Account tab under Personalize Your Portal Experience click Browse For Image for both your photo and logo.

– access marketing 2a – Agent Marketing Materials

  • Before downloading the newsletter or Maintenance Manual, be sure to check the box to Personalize with my image and logo.

– access marketing 2 – Agent Marketing Materials


Ordering Brochures

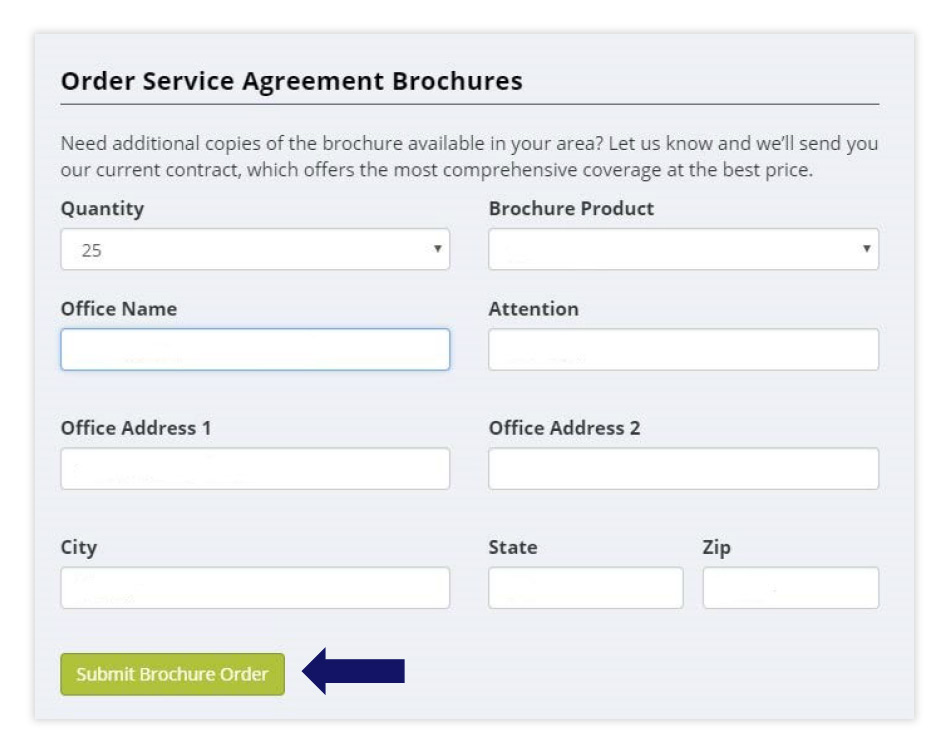
At the bottom of the page, find Order Service Agreement Brochures

  • Select the product and quantity you want
  • Enter your shipping information
  • Select Submit Brochure Order

– access marketing 3 – Agent Marketing Materials


Tech Protection Plan

Help your homeowners. protect the tech that keeps their home connected.

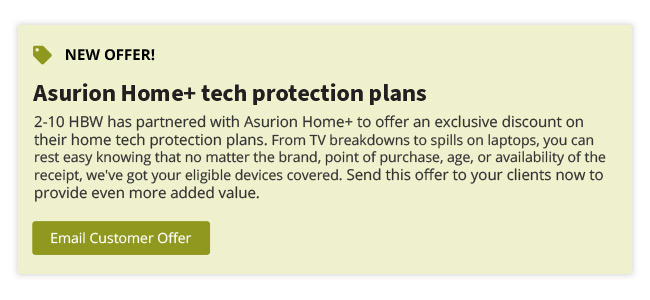
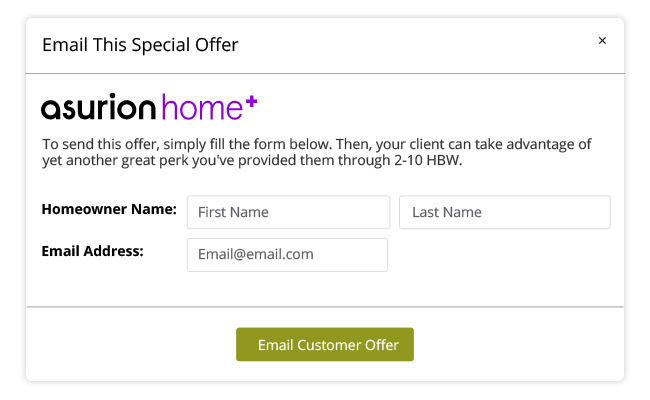
  • Under the My Marketing Tools tab select Email Customer Offer
  • Enter the name and email address and select Send Email Offer
– asurion green – Agent Marketing Materials
– asurion popup – Agent Marketing Materials

Super User

Agent Portal includes powerful admin tools that make it easy for support teams within an office to better manage their business.

  • Enroll on behalf of agents
  • Track and update coverage
  • Order free marketing materials
  • Resend invoices on an agent’s behalf

To set up Super User functionality, please call Agent Services at 720.531.6723 for verification assistance.

REMEMBER! Everything you do in Super User mode will be on that agent’s behalf, so please use caution.

Download Quick Guide
Download Complete User Guide


Enrolling as a Super User

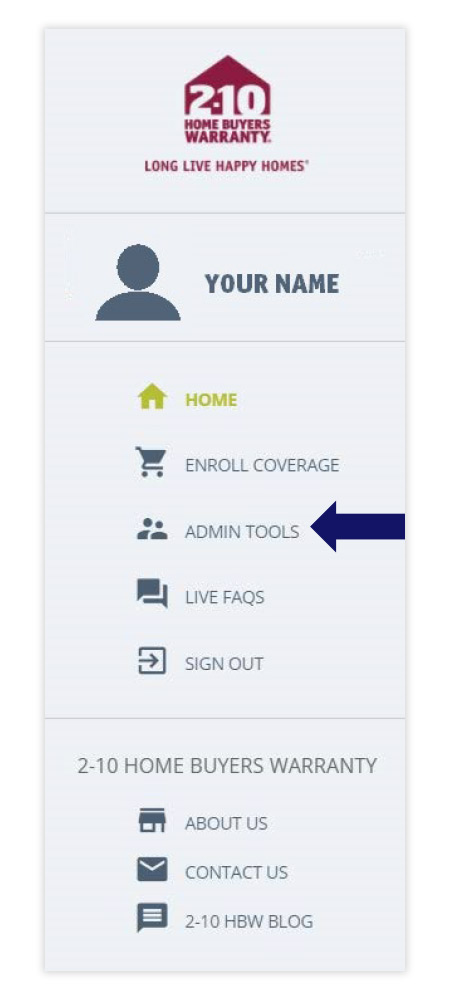
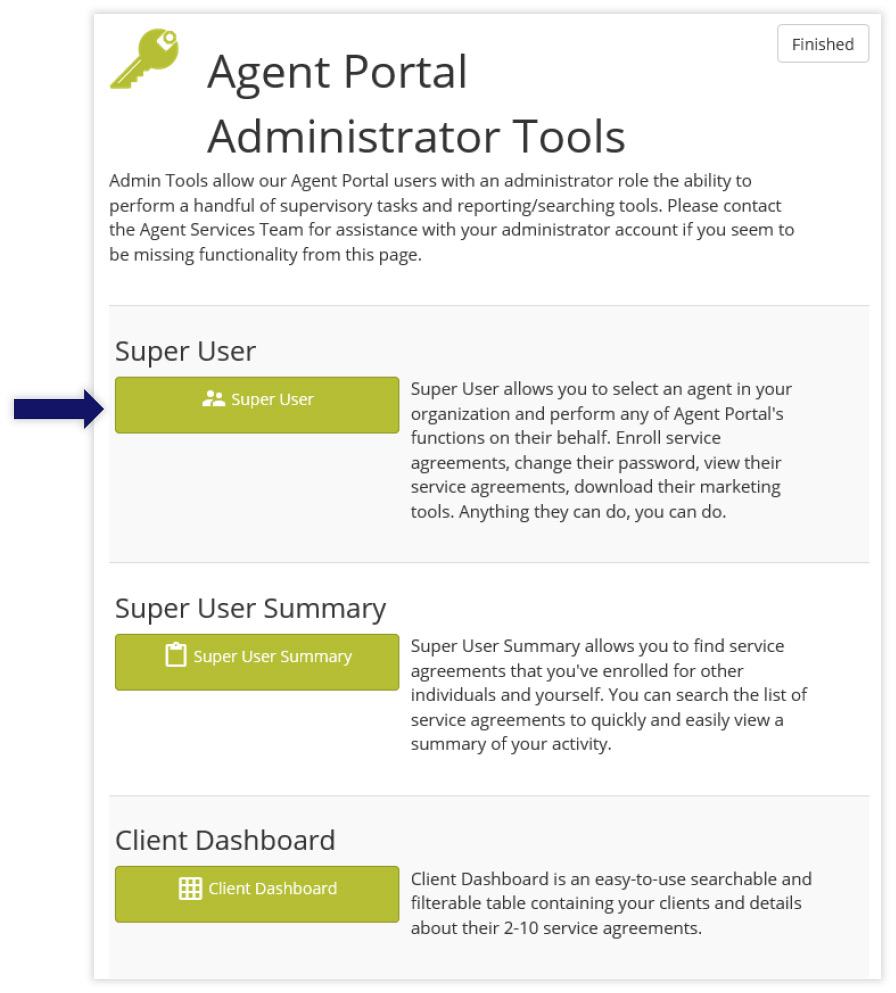
Once Agent Services can verify you and enables Admin Tools for your account, you can access by selecting Admin Tools in the lefthand menu.

  • Select the Super User button on the Agent Portal Admin Tools page.
– super user 1 – Super User
– super user 2 – Super User
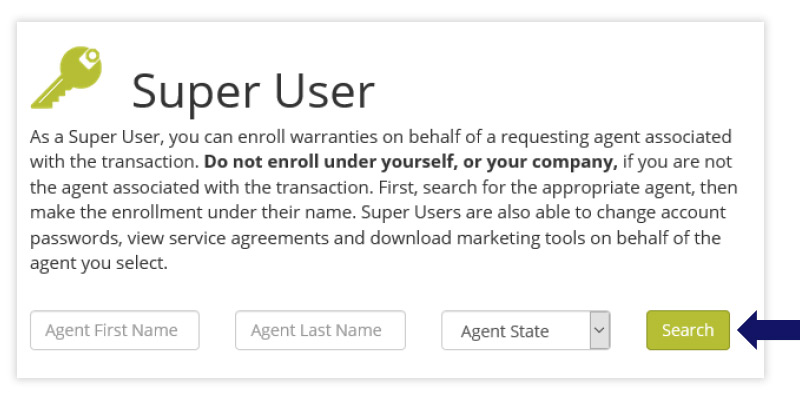
  • Enter the information for the agent you’re acting as. You must have this information to properly enroll as a Super User.
  • IMPORTANT! Do not enroll under yourself or your company if you are not the agent associated with the transaction.

– super user 3 – Super User

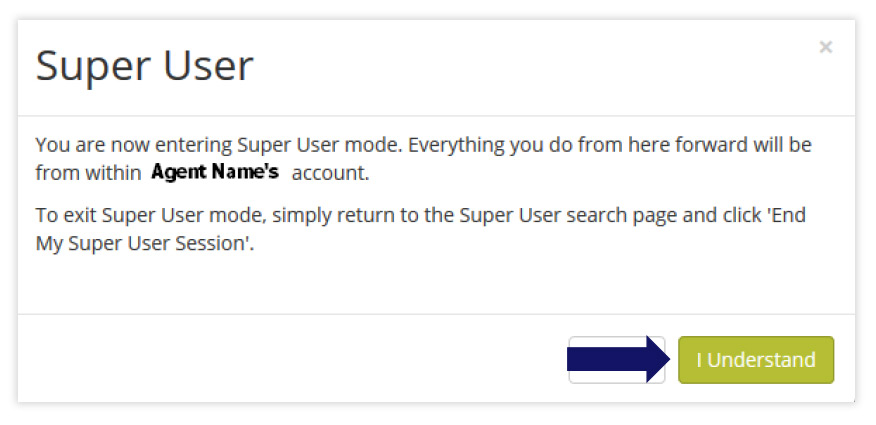
  • A final notice will appear to confirm that you are entering Super User mode and acting as someone else.
  • When ready, click I Understand.

– super user 4 – Super User

You can now use all the functionality of Agent Portal on behalf of the agent you are acting as, including enrolling coverage, adding options, and more.


Title Company or Settlement Service Users

If you are a title company or settlement service user:

  • You will be automatically directed to Super User mode upon logging in
  • If you are not in Super User mode, a warning will appear and advise you to enroll through Super User mode as the agent associated with the transaction